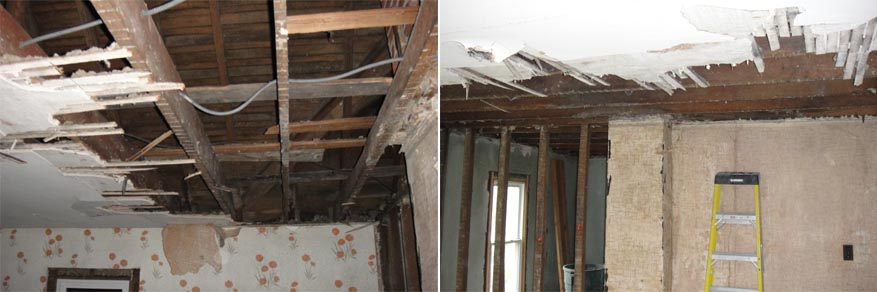
Showing posts with label ceiling. Show all posts

Monday, July 11, 2011

Busy Bees!

Once again, my in-laws came out to help with the house renovations.  Thank goodness!  We could really use it!  LOL!
This past weekend, they worked on finishing leveling the floor in the hallway, insulating the hallway, and continuing to mud the nursery and guest rooms.  They all have done an amazing job, and it is really starting to come together.  The hallway looks awesome!  I'm excited to see the finished product.  We have really made quite a change in that hallway by knocking down 3 walls and adding in a corner closet and built-in.  It is going to look so good!!!  I can hardly wait!  We are still on the hunt for the newel posts, spindles, and handrail for the upstairs landing.  If anyone knows of a place they can recommend, please let us know!  We don't want to spend more than $100 per newel post (we need 2 1/2), yet we want ones that are at least 4 1/2" in width to make them feel more authentic for the age of our home.  

Picture Time!

Leveled Floor in Hallway

Insulation on Ceiling and Walls in Hallway
 (Looking Towards Nursery)

More Hallway Insulation
 (Looking Towards Guest Room)

Mudding so far in Nursery

Mudding so far in Guest Room

One of the nights when we were all eating dinner, we had an unexpected house guest.  Jim looked up to see a  big ol' fat ground hog staring in at us from our front door stoop.  We've never noticed a ground hog before, so it was a complete surprise.  He was just sitting there as if waiting for us to invite him in.  LOL!  He didn't seem afraid of us at all.  After a few moments, he calmly walked off to lounge under one of the bushes we have out front.  Maybe the septic guys destroyed his home when we had the new septic installed...

Wednesday, July 6, 2011

Now I Know We Are Crazy!!!

*If you want things to make sense, you might want to scroll down to the post titled "Hooray for New Septic Systems!" and read up the blog.  If not, you will end up reading backwards through time if you start with this post.*

Here is how our Independence Day holiday weekend broke down:
Saturday
Jim and his dad designed and built the scaffolding for the stairwell while Jim's mom and I worked outside with the new planters that I wrote about earlier.  I was pretty impressed with their design.

Here is the scaffolding.
The individual beams across the top in the pic on the left can be removed for people to go up and down the stairs.  I referred to them as the "pregnancy barrier," since I can't get up the stairs unless the final beam furthest from the camera is also removed.  I could probably climb over it to get upstairs, but there is no way I am going to climb back over it to go downstairs.  I don't feel like taking the express way down. 

At some point, Jim's dad suggested removing the other 2 walls surrounding the stairwell.  This has been an idea I've brought up to Jim before, but he has always come up with reasons not to do it.  These other 2 walls are not original to the house.  They are walls previous owners put up when creating the rental space upstairs.  I believed that there originally used to be a guardrail surrounding the stairwell opening and not walls.  Jim's dad agreed with my theory.  Now that my FIL was on board with the idea of removing the walls, Jim decided to give the idea more thought.  This is another "now or never" project, so it does require a lot of thought.

*Pros to Removing the Walls*
~the space would really open up and be easier to move things around
~there would be more light in the hallway
~the hallway is currently super narrow already and would become even more cave-like after we finish leveling the ceiling and floors
~we would be bringing the home back to its more original state
~the area would be airier/breezier
~we most likely wouldn't regret taking the walls down in the long run, but might regret not taking them down when we had the chance

*Cons to Removing the Walls*
~Jim would have to redo some of his rewiring that he already has done
~we risk not finishing everything before the baby arrives
~children might decide to either try to squeeze through the landing spindles, attempt to climb the guardrail, or decide to toss/drop things down the stairs between the spindles.
~this would cost more $ than keeping the walls

Sunday

Jim was still debating with himself whether or not to remove the walls still, so Jim and his dad worked on other projects upstairs including more electrical, framing in a small corner closet with triangular built-in, and framing a future linen closet that won't be fully created until the bonus room/upstairs kitchen is renovated.  Since I wasn't allowed up there still during demolition, I'm not sure of everything they did.  I know of one casualty, though.  Jim accidentally dropped a tool in-between the wall.  It dropped all the way down to the first level, so we won't be able to recover it until we remodel the family room...and who knows when that will be.  LOL!  Poor Jim.  At least it wasn't an essential and/or expensive tool. 

Monday (4th of July)

Decision day!  
Our final decision was to remove the walls!  Yea!  I am over-joyed!  :D  I am so glad Jim has finally seen that it would be so much better in the long run if the walls were gone.
*Happy Manda Dance!*
Jim's parents and youngest brother (Eddie) came out to celebrate the 4th of July as well as helping out with demolition.  They once more closed themselves upstairs via the scaffolding and got to work.  I remained downstairs and went along with my business of updating this blog.  While the guys were destroying things, my MIL was mudding the drywall in the guest room and nursery.
Here are some pictures of the hallway/stairwell.

Before
This is what the hallway looked like when we first moved in.  It illustrates quite well how narrow it is.  The doorway to the right leads to the stairwell.  The doorway to the left is to the bonus room/renter's kitchen.

After the Drywall Removal
Looking down the stairwell

Looking across stairwell
 That is the nursery doorway straight ahead and the bonus room doorway to the far left covered in plastic.

View from the nursery doorway

After the Stud Removal

Looking up from the stairwell

Looking across the stairwell
 That is the balcony door that is open that used to lead to exterior stairs for the renters.

View from the nursery doorway

The door covered in plastic leads to the master bedroom

Looking down the stairwell
If you look to the immediate left of the stairwell on the floor, you can see where the old newel posts and spindles used to be before the walls were erected.  It's sad.  The original guardrail and newel posts were probably thrown out.  :'(  We're currently on the hunt for new newel posts and spindles that are in our budget and look Victorian-esque.  We will need a total of 2 1/2 newel posts (the half is for the newel post that will be against the wall) and about 30 or more spindles.  Current code wants spindles to be no more than 4 inches apart to prevent children from getting stuck between them or slipping through them.  I measured the distance between the original spindle marks, and they were 6 inches apart.  In the meantime, we will close off the hole in the floor with the scaffolding when we are working up there to prevent anyone from falling off the edge.
If anyone knows of newel posts and/or spindles for a decent price, please let us know.  We will end up needing about ~10ft of guardrail.  The guardrail needs to be a total of between 34 to 38 inches in height to be to code.

Here is a picture of our corner closet and built-in so far

The closet won't be very big, but it will be able to hold a vacuum cleaner and other cleaning supplies.  The triangular built-in will consist of a cupboard on the bottom, a fake drawer in the middle, and open shelving on the top.  The shelving will hopefully be too high up for a toddler to try to climb it.  It would be nice if the cupboard doors had glass, but that probably wouldn't be a good idea with small children.  *Sigh, sacrificing for them already.*  LOL!

And, that is where we stand in our upstairs project.

Let There Be Light. And There Was Light. And The Light Was Good.

I think we must have gone crazy, but we can blame my FIL for that. ;)  When he was over one day to help Jim level the hall ceiling, he asked Jim if we ever thought about knocking down the wall at the top of the stairs.  I don't know why, but Jim and I had never thought of doing that.  It is a small wall that is in no way a support wall.  It was just the other side of a closet. When previous owners rented out the upstairs, they built walls surrounding the top of the stairs and made a doorway to the right of the stairs to basically create a divide between the renters and themselves.  The renters would have no need to come downstairs because they had their own "apartment" upstairs that included a kitchen, bathroom, 2 other rooms, and their own private balcony and staircase to the outside.  This is sadly the fate of many largeVictorian homes.  We are in the slow process of reverting the home back to its more original state of being a single family home.  The outside stairs to the second story has long been gone before we even bought the house, but the upstairs is still sectioned off from the downstairs and the upstairs kitchen is still very much a kitchen.  Anyways, we discussed it and have decided to knock down the wall.  It is basically a now or never thing.  So, we aren't done with demolition like Jim had stated in the previous post.  LOL!  The wall itself isn't the problem.  It is the fact that if we take the wall down, we would also need to remove the upstairs stairwell ceiling and wall to the left of the stairs in order to have the total ceiling level upstairs.  This would increase the original projects scope and would delay our project completion date.  Any delay is a big thing since we have a definite deadline now with the impending arrival of the baby.

Before Shots of the Walls

The 2 green walls in this picture will be removed as well as the ceiling.
 In case you were wondering, the green wallpaper also has a gold glitter embedded in it.  Jim says this is the worst wallpaper in the house.  I disagree.  I feel that title goes to the pilgrim wallpaper in the family room with images of muskets, barns, beehives, and so much more on it. : p

This doorway  to the right will also be removed.

This is the wall from the other side.  Jim had removed a corner closet as part of the original plan already.

We were planning on building another closet in its place, only better.

After Shots of the Small Wall and Doorway Removed

Bye-Bye Wall!
 The light from the window really lights up the stairwell now.  I keep thinking I left the downstairs stairwell light on.  LOL!  That window will definitely need some type of shade or light filter.

Removing that one little wall and doorway has really opened up the space!

Because our master is right there, we have temporarily (once again!) made a make-shift bedroom downstairs.
We were smart this time and brought our mattress downstairs to sleep on.  There was no way my pregnant self was going to sleep on an air mattress for an extended amount of time.  ;)

You can see where the wall and doorway used to be in this pic.
It will be much easier bringing stuff up the stairs and around the corner now.

Since knocking down the stairwell ceiling and other green wall will require scaffolding, that demolition needed to wait for another weekend.

Tuesday, July 5, 2011

The Straight and Level

Our second story renovation project(s) have been progressing rather slowly lately. After we installed the drywall in the two bedrooms in May, the next phase of the renovation project began. As you know, I've spent a few weekends cleaning up blown-in insulation and knocking down the old plaster and lathe in the hallway. We have finally progressed past the point of demolation, and we can begin building-up again.


I had been prepared two weekends ago to remove the plywood subfloor and tile in the hall. Once I lifted one of the plywood sheets though I found the reason the subfloor was there at all. Luckily, I did not find a pack of rabid opposum, or a used mail-order taxidermist assistant's kit, or a space/time rift under the subfloor. But the original floor boards are warped to such a degree, that the triangular 2x4 ribs which brace and level the plywood subfloor measure up to 4 inches on the lowest side. I quickly put the subfloor back, then slowly took a cautious second look.

If I were to fix the slanted original floor, I would do what has already been done. Therefore,...
Amanda is taking over this post, since Jim has been too preoccupied with actual renovation to finish his draft. :)
Jim has decided to leave the already leveled part of the floor alone, and we will just build the rest of the floor up to that point.  This means that Jim does not have to remove any of the tile.

The Tile


Jim has since leveled the ceiling but not the floor (will be explained in future posts).

Leveled Ceiling
Don't let the old beams fool you, the new wood is what is level.

While Jim was removing the plaster and lath from underneath the one and only hallway window, he came across an interesting find...

An Old Beehive With Layers of Honeycomb
Alas, no honey.  This was a very old hive from the looks of it.

With the help of Jim's parents, we were also able to finally install the fold-up attic stairs that we purchased months ago on sale.

The Frame

The Stairs Closed

The Stairs Open
It is so much easier to get up into the attic now.  We are both really glad that we decided to do this.  The previous attic access was very small and inconvenient.  No fears, we have purchased fire-rated drywall for the stair's "lid" as per code.

We would also like to share with you the pics of our doors for the nursery and guest rooms.
The pre-hung doors on the left will be the style for the bedroom doors.  I noticed that the original doors in the house (of which there seem to be only 2- not counting the french doors) are both 4 panel doors.  These were the closest match we could find in our budget without actually buying vintage doors.  The doors on the right will be used for the sliding doors in the closets.  These are also styled after vintage doors, and Jim really liked the look of them.  We bought them a few months back when Lowe's was having a sale on custom doors.
   

Monday, April 18, 2011

Drywall Speedsters

This past Saturday, my MIL and FIL came over once more to help with drywall.  I was amazed how much they accomplished.  The nursery and guest room are now completely drywalled!  We still have to mud it and such, but all the drywall is up except for the trim around the windows.  Once again, I was relegated to photographer, cook, and water girl.  :)

1/2 the Guest Room Ceiling Complete

Jim Taking Measurements for the Smoke Alarm in the Guest Room

Drywall Coming Through!

Sealing off the Nursery and Guest Room from Each Other

Jim and I tried to take panoramic shots of the rooms, but we haven't quite gotten the hang of it yet. ^_^*

Panoramic Views of the Nursery
 This photo was taken from the wall opposite the door and next to the window on that wall.

This photo was taken from the same wall as the door, but in the opposite corner.

Panoramic Views of the Guest Room
 This photo was taken from the doorway.

This one was taken from the opposite diagonal corner.

Next on the agenda will be prepping the upstairs hallway for demo.

Thursday, April 14, 2011

Hallelujah Drywall!

I am happy to say that we have finally started drywalling!  And by "we", I mean Jim and his parents.  LOL!  I was not allowed to help.  Drywall is heavy!  ^_^*

The first piece!

The nursery ceiling is complete!

MIL scoring the drywall

Father and son working together

Great shot of Jim

Working on the nursery closet and walls

Believe it or not, they did all this in one day!  I was quite astonished.
Thanks Mom and Dad C.!

Sorry I can't give more details.  My jobs that day included taking pictures, bringing water, and making dinner for them.  

Wednesday, December 29, 2010

Ceiling Fans!

I almost forgot to tell you about our ceiling fans!  Jim and I have finally ordered some for the nursery and guest room!  I wanted to find something that looked like it would fit in a century home (even though they didn't have ceiling fans back then).  I found a fan that I liked, but Jim wanted to sit on the fence about it and mull it over.  This tends to frustrate me.  Especially at times likes this when the fan was on sale for 50% off!  Of course, Jim waited too long, and the sale ended.  Ack!  I had spent too much time looking for a darn ceiling fan that would fit our needs, only for Jim to be wishy-washy and therefore have us miss out on the sale!
I told Jim to try to find that exact fan on sale somewhere else.  And boy did he deliver!  He found the same fan in the finishes we wanted for a price that was even better than the original sale price!  You better believe that we bookmarked that website for any future lighting and fan orders.  :)
The fans are Monte Carlo Ornate Elite Renaissance 52".  We couldn't decide on which finish we like better, so we ordered one in British Bronze and the other in Corinthian Bronze.  We liked the extra detailing in the fan.  The fan also has good reviews, so we are pretty sure we'll like it too.

Tuesday, October 12, 2010

Let the Walls Come Down that Separate You and Me

Woo!  Last week was a grueling week, but I think I've now recovered.   I have plenty of pics to show you our progress as we tore out the plaster walls and ceilings in the nursery, guest room, and part of the hallway.  However, I wanted to finish what we did in the attic.  We did manage to remove most of the blown-in insulation from the attic floor over the guest room and nursery.  The only other new discovery we made was some charts that look like they belong in a butcher shop.  They are diagrams of the various cuts of meat for a cow, pig, and lamb.  There were also some posters of various types of cows.  They are labeled with American Angus Association and F. C. Murphy.  Maybe I'll try to google them and see if they are worth anything.  While we were working in the attic, Jim made a hole large enough in the nursery ceiling for the trash bags full of insulation to pass through.  As you can see in the pic, our nursery was pretty full of bags by the time we were through.  We also learned to double bag everything, or they would explode on impact when tossed out the 2nd story window.  Bleh!


 Friday, Oct 1st
After our dumpster arrived, we got straight to work.  Jim took a vacation day for Friday and the following Monday to allow us extra time for demolition. We started with the nursery ceiling. By the end of the process, I had decided that tearing out plaster ceilings was my least favorite part of demo.  No matter how careful, or what type of goggle PPE we were wearing, rubble would somehow get in our eyes.

 This is what the ceiling looked like after we were done.

Saturday, Oct 2nd
We had a late start on Saturday so we were only able to tear out 1/2 the wall separating the nursery and guest room, and 1/2 of the guest room ceiling.  The wall that we did remove will be where the new closets will go.

This second pic is looking from the guest room towards the nursery.

Sunday, Oct 3rd
We also had another late start on Sunday, but we managed to remove the rest of the guest room ceiling and the other half of the wall separating the two rooms.
The pic on the left is looking from the guest room into the nursery.
 The pic on the right is looking from the nursery into the guest room.

The left pic is a view of the attic and chimney from the guest room.
That is quite a growing pile of lath we have in the nursery, eh?

Monday, Oct 4th
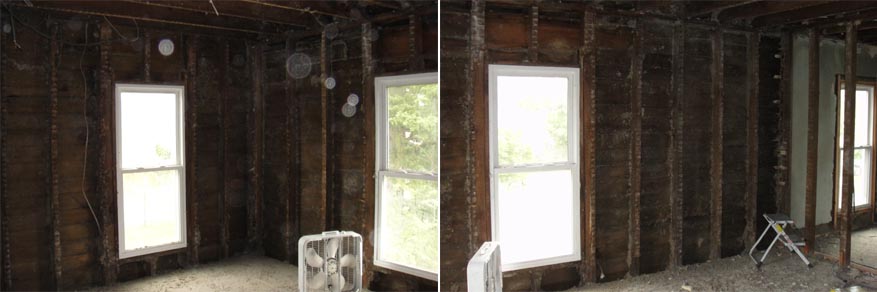
We were able to get a lot accomplished on Monday.  We removed all the plaster from the guest room walls, and were also able to remove the lath and insulation from one entire wall.

You can see the various stages of demo in these 3 pics.

Tuesday, Oct 5th
This was the first day I was all alone.  I was quite the busy bee and was able to remove all the remaining lath and insulation from the guest room walls.  

 Since I was going to start on the nursery the following day, I threw out the giant pile of lath that was in the center of the nursery.  When Jim came home, he moved some of it onto a tarp in hopes of moving it to the firepit later.


While I was working on the area by the east window in the guest room, I made quite an interesting discovery. 
Can you guess what I found buried in the wall?  
a) Gold coins  
b) Blue prints of the house  
c) Human bones
d) Lingerie
e) Dead animal
If you guessed a, b, c, or e, you would be wrong.  That's right, folks!  I found lingerie balled up in my wall!  There was also some baby clothes and a little girl's dress.  I have as yet to take a picture of them, but when I do, I'll post it.  When I first saw the clothing, I was a little apprehensive because it was balled up in the wall as if something was bundled inside.  My first thought (which was quite morbid) was that I was about to find the remains of a baby.  Fortunately, that was not the case.  However, this still begs the question of why you would purposefully leave lingerie in the walls?  OK, I can sort of see the baby clothes as a timecapsule-keepsake-legacy-thingy that you'd want someone years from now to discover...but lingerie?!  That is just nasty and disturbing!  And if you wanted to leave it as a legacy-thingy, why would you not at least put it in a bag to protect it?  

Wednesday, Oct 6th
Day 2 of being on my own.  I was able to remove all the plaster from the nursery walls.  You can see the fan in the first pic that I used to blow all the dust outside as I was working.  By this point, I was starting to get quite tired of my respirator; but it was a necessary evil.


Thursday, Oct 7th
Come Thursday, I was starting to feel like this demolition would never end.  I did manage however to remove all the lath and insulation in the nursery, except for one area in the southeast corner.  I did not find anything else remarkable hidden in the walls.


Friday, Oct 8th
Yea!  Friday had finally arrived!  This was my last day of demolition by myself.  I managed to remove the remaining lath and insulation in the nursery as well as the lath from the one hallway wall.  Since we are moving the upstairs breaker box from the guest room to this hallway wall, we decided to demo it too while we were at it.  When Jim got home from work, we ripped up the carpeting and threw it out the window.  I have a feeling that that green carpeting will never be green again.  It was quite dirty and dusty by the time we were through.
These are pics of our newly exposed wood floors (most likely pine).
                             Left: guest room              Right: nursery

This is what the "walls" look like now.
 Left: In back corner of guest room looking towards hallway
Right: In nursery looking towards hallway.

I took this pic of Jim while I was standing in the hallway.  Jim is in the guest room, and I am looking at him through the hallway and nursery wall studs.

Saturday, Oct 9th
I just want to say that I was skeptical of this plan from the start.
Jim wanted to try to use the lawn mower to drag the tarp full of lath to the firepit.  I had my suspicions that the  pile was too big, but Jim wanted to give it the old college try.  The only thing Jim was successful at was pulling the grommets out of the tarp.  LOL.
We switched to Plan B after that, which was attaching the dump cart to the lawn mower and taking the lath back in multiple trips.


Randomness
Here are pics of the only 2 new flowers I have blooming now.
 It is quite sad.  I think at this point, I have more weeds blooming than flowers.

Jim was recently in the basement and saw this little fella on our cellar door stairs.
That very night, Jim was on the family room floor playing video games when he saw a mouse scurry past him.  The next day, he went out and bought some mouse traps.  We have since captured 4 total using peanut butter.  We can't really take credit for the 5th mouse...or maybe we can...
I know this is a little disturbing, but I couldn't help but laugh; It just seemed so comical.  After they took away the dumpster, we went out to inspect the damage to our lawn.  Lo-and-behold, there was a squished mouse where the dumpster had been.  He was pretty flat.  The part that made me laugh though was not this poor mouse's fate, it was the way he was positioned.  He was on his back, all four feet in the air, with his head turned to the side and his mouth open.  The only thing needed to complete the picture was his tongue hanging out.  Honestly, he looked just like what a cartoon animal looks like when they die.  I took a pic, but later decided to spare everyone the image.
After Saturday's bonfire and mystery (see Spirit Watcher tab), Jim and I were in the family room reading.  We both looked at each other when we heard a strange howling/barking coming from outside.  We cracked open one of the windows to hear better.  It sounded like an entire pack of dogs, but not quite dogs.  The sounds seemed too high pitched and strange to be dogs.  We decided that maybe there are coyotes hunting/living across the street in the farm fields and vacant lots.  This is even more reason why I want to fence in our yard.

 This is a picture of the farm across our street.  I love the view.  It looks even more serene in person.

Left:  Me posing by the mimosa tree/bush before leaving for a luau themed company clambake.
Right:  I just like this picture of Jim I took recently.

Yes!  I've finally finished!  I hope you like the update.  I was too tired to blog during the demolition week, so it kept building up.
Toodles, Noodles!